A Beginner’s Guide to Copper Stamping Techniques and Tools
Copper stamping is a fascinating craft that allows you to create intricate designs on copper sheets using special tools and techniques. Whether you’re a complete beginner or a seasoned crafter looking to expand your skills, this beginner’s guide to copper stamping techniques and tools will provide you with all the information you need to get started. From basic stamping techniques to more advanced methods like embossing and engraving, we’ll take you through the step-by-step process of creating beautiful copper designs that are sure to impress. With our expert tips and advice, you’ll learn everything you need to know about choosing the right tools, selecting the best copper sheets, and mastering the art of stamping. So whether you’re looking to create unique jewelry pieces, decorative home accents, or custom gifts for friends and family, this guide has everything you need to unleash your creativity and start making stunning copper designs today!
Tools Needed for Copper Stamping
Before you start your copper stamping project, you will need to gather the necessary tools. Here are some of the essential tools you will need:
- Copper sheets
Copper sheets are the foundation of your project, and it’s important to choose the right thickness for your design. Thicker copper sheets are more durable, but they can be harder to work with. On the other hand, thinner sheets are easier to manipulate, but they may not hold up as well over time. A good starting point is a 24-gauge copper sheet.
- Stamps
Stamps are the tools used to create the design on the copper sheet. You can find a wide variety of stamps with different designs, sizes, and shapes. It’s important to choose the right stamp for your project. Some stamps are better suited for larger designs, while others are better for smaller details.
- Hammer
A hammer is used to apply pressure to the stamps and transfer the design onto the copper sheet. A rubber mallet or a brass hammer is recommended because they won’t damage the stamps or the copper sheet.
- Bench block
A bench block is a flat, sturdy surface that is used to support the copper sheet while you’re stamping. It’s important to choose a bench block that is heavy enough to provide stability and prevent movement while you’re working.
- Hole punch
A hole punch is used to create holes in the copper sheet for attaching jump rings or other findings. It’s important to choose a hole punch that is the same size as the jump ring you plan to use.
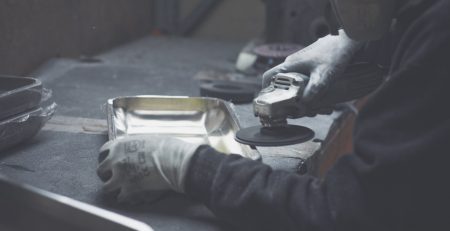
- Sandpaper
Sandpaper is used to smooth out any rough edges or burrs on the copper sheet after stamping. It’s important to choose fine-grit sandpaper to avoid scratching the copper surface.
Basic Copper Stamping Techniques
Now that you have your tools ready, it’s time to start stamping. Here are the basic steps for copper stamping:
- Prep the copper sheet
Start by cleaning the copper sheet with a soft cloth to remove any dirt or oil. Then, place the copper sheet on the bench block and secure it with tape or clamps to prevent movement.
- Choose your stamp
Select the stamp you want to use and place it on the copper sheet where you want the design to appear. Make sure the stamp is facing the correct way.
- Hammer the stamp
Using a hammer, apply firm pressure to the stamp and strike it once or twice to transfer the design onto the copper sheet. Be careful not to hit it too hard, or the design may become distorted.
- Repeat the process
Continue stamping the design, moving the stamp around the copper sheet as needed. Once you’ve completed the design, use sandpaper to smooth out any rough edges or burrs.
Advanced Copper Stamping Techniques
Once you’ve mastered the basic stamping techniques, you can move on to more advanced methods like embossing and engraving.
- Embossing
Embossing involves creating a raised design on the copper sheet. To emboss, place a piece of foam or other soft material underneath the copper sheet and use a stylus or other embossing tool to push the design from the back of the copper sheet. This will create a raised design on the front of the sheet.
- Engraving
Engraving involves removing metal from the copper sheet to create a design. To engrave, use a sharp tool like a graver or a burin to cut into the copper sheet. This can be a more challenging technique, but it can create stunning results.
Preparing Copper for Stamping
Before you start stamping, it’s important to prepare the copper sheet properly. Here are some tips for preparing copper for stamping:
- Clean the copper sheet
Clean the copper sheet with a soft cloth to remove any dirt or oil. This will ensure that the stamps transfer cleanly and accurately.
- Anneal the copper sheet
Annealing is the process of heating the copper sheet to soften it and make it easier to work with. To anneal, use a torch or a kiln to heat the copper sheet until it turns red. Then, allow it to cool slowly.
- Protect the copper sheet
Use masking tape or painters tape to protect the surface of the copper sheet from scratches or other damage while you’re stamping.
Copper Stamping Project Ideas
Now that you know the basics of copper stamping, it’s time to get creative. Here are some project ideas to inspire you:
- Jewelry
Copper stamping is perfect for creating unique jewelry pieces like pendants, earrings, and bracelets. Combine different stamp designs and techniques to create one-of-a-kind pieces.
- Home accents
Use copper stamping to create decorative home accents like picture frames, candle holders, and wall hangings. These pieces make great gifts or a beautiful addition to your own home decor.
- Custom gifts
Create personalized gifts for friends and family using copper stamping. Stamp their name or initials onto a copper sheet to create a custom keychain or bookmark.
Copper Stamping Mistakes to Avoid
While copper stamping can be a fun and rewarding craft, there are some common mistakes to avoid:
- Hitting the stamp too hard
Be careful not to hit the stamp too hard, or the design may become distorted or even break through the copper sheet.
- Not annealing the copper sheet
If the copper sheet is too hard, it can be difficult to stamp. Make sure to anneal the copper sheet before you start stamping to make it more malleable.
- Using the wrong stamp
Make sure to choose the right stamp for your design. Using the wrong stamp can result in a design that is too small or too large for your project.
Tips for Successful Copper Stamping
Here are some tips to help you achieve the best results with your copper stamping projects:
- Practice on scrap copper
Before you start stamping your final design, practice on a scrap piece of copper to get a feel for the stamps and the hammer.
- Keep your stamps clean
Clean your stamps regularly to prevent buildup that can affect the quality of the design.
- Be patient
Copper stamping can be a slow and meticulous process. Take your time and enjoy the process.
Resources for Copper Stamping
Here are some resources to help you learn more about copper stamping:
- Online tutorials
There are many online tutorials and videos available that can help you learn more about copper stamping techniques and tools.
- Craft stores
Visit your local craft store to find a variety of copper sheets, stamps, and other tools.
- Copper stamping groups
Join a copper stamping group or forum to connect with other crafters and learn new techniques and tips.
Conclusion
Copper stamping is a fun and rewarding craft that allows you to create beautiful designs on copper sheets. With the right tools and techniques, you can create unique jewelry pieces, decorative home accents, and custom gifts for friends and family. Remember to choose the right tools and stamps for your project, prepare your copper sheet properly, and take your time to ensure the best results. Happy stamping!